Highlights
- You can safely download the Windows 11 25H2 ISO either from Microsoft’s official website or from msdl.tech-latest.com.
- Use the Media Creation Tool for an easy, automated way to make a bootable USB, or Rufus for more control with the ISO file.
- Always back up your data and verify the USB before installing to ensure a smooth and error-free Windows setup.

Upgrading or reinstalling Windows can sound complicated, but it doesn’t have to be. If your computer feels slow, you may need a fresh start, or if you’re building a new PC, installing Windows 11 version 25H2 using a bootable USB drive is one of the simplest and most reliable ways to do it.
The process is easy enough for anyone to follow, even if you’ve never installed Windows before. You just need your working computer, a stable internet connection, and a USB drive with at least 8GB of space .
Don’t want to miss the best from TechLatest ? Set us as a preferred source in Google Search and make sure you never miss our latest.
So, if you have these things, then let’s check out our step-by-step guide to create a bootable USB for Windows 11 25H2.
Content Table
What is Windows 11 25H2?
Windows 11 25H2 is Microsoft’s latest feature update for 2025. Think of it as a refreshed and improved version of Windows 11, with better performance, more security features, and a few design changes.
Microsoft usually releases big updates like this every year. The “25” stands for the year (2025), and “H2” means it’s the second half of the year release.
If your PC already has Windows 11, you may get this update automatically later. But if you want to install it fresh or upgrade right away, making a bootable USB is the best option.
Prerequisites
Before we start, you must meet these prerequisites:
- A USB Flash Drive (8GB or more): This will be completely erased, so back up anything important on it first.
- A Working Computer with Internet Access: You’ll use this to download the files and prepare the USB.
- Windows 11 25H2 ISO File or Setup Tool: We’ll show two safe ways to get it.
- One of Two Programs to create the bootable USB: Microsoft’s Media Creation Tool Rufus is a small free program for creating bootable drives.
Once you have these, you’re good to go.
Step 1: Downloading Windows 11 25H2
To install Windows 11, you need the setup files, either directly from Microsoft or from another trusted source. We’ll use two methods here.
Method 1: Download Directly from Microsoft (Recommended)
The safest and easiest way to get Windows 11 is directly from Microsoft. This ensures you get a clean, official copy that hasn’t been modified.
- Open your browser and go to Microsoft’s official download page:
- https://www.microsoft.com/software-download/windows11
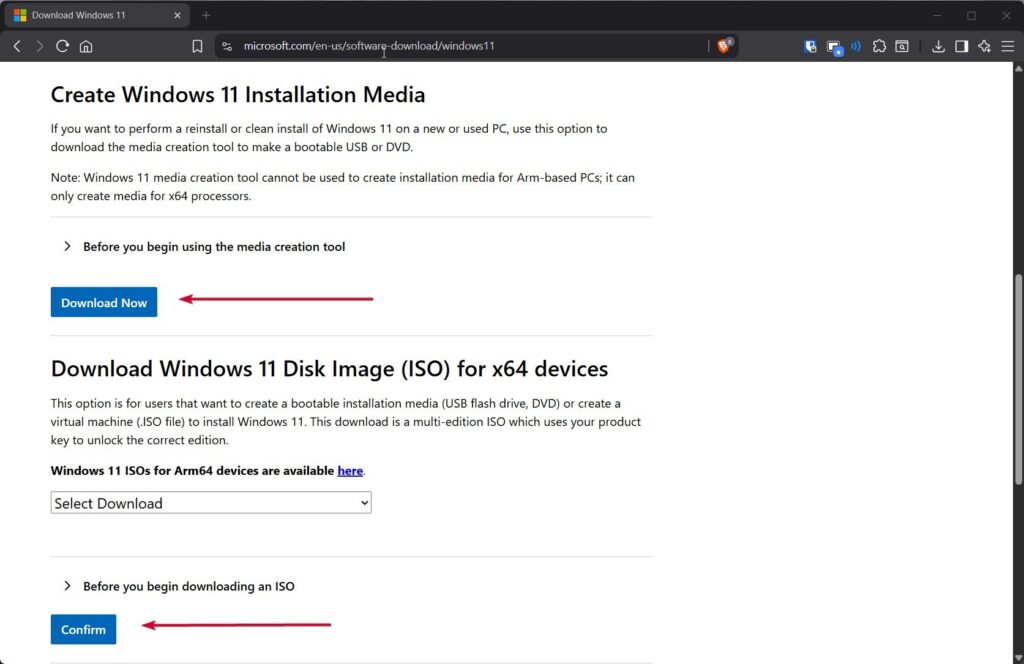
- On that page, you’ll see two main options: Create Windows 11 Installation Media Download Windows 11 Disk Image (ISO)
- If you want to use the Media Creation Tool , you can click the first option. But if you want to use Rufus , download the ISO file instead by selecting your edition (Windows 11) and language and clicking Download .
- Microsoft will give you a direct link to download the ISO file. The link usually stays valid for 24 hours, so make sure to save the file before it expires.
Method 2: Download via msdl.tech-latest.com
Sometimes, Microsoft’s site can be slow or temporarily unavailable. In that case, you can use msdl.tech-latest.com , a website that provides Windows ISOs directly from Microsoft servers. Here’s how you can do it safely:
- Visit https://msdl.tech-latest.com
- Look for Windows 11 and then select Version 25H2 .

- Pick your preferred language.
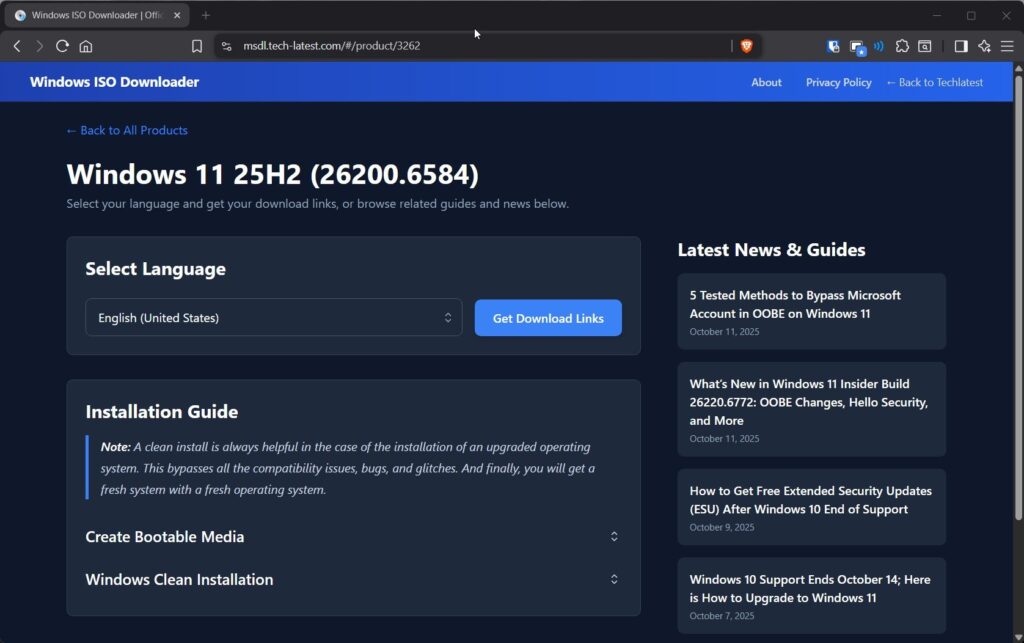
- Download the ISO file for 64-bit systems (since Windows 11 no longer supports 32-bit PCs).
Step 2: Creating a Bootable USB Drive
Now that you have the ISO or installation media, it’s time to turn your USB flash drive into a bootable Windows 11 installer . We’ll look at two simple methods, one from Microsoft and one using a small external tool.
Method 1: Using the Windows Media Creation Tool
Microsoft’s Media Creation Tool downloads the setup files and makes the USB bootable automatically. You don’t need to configure anything manually.
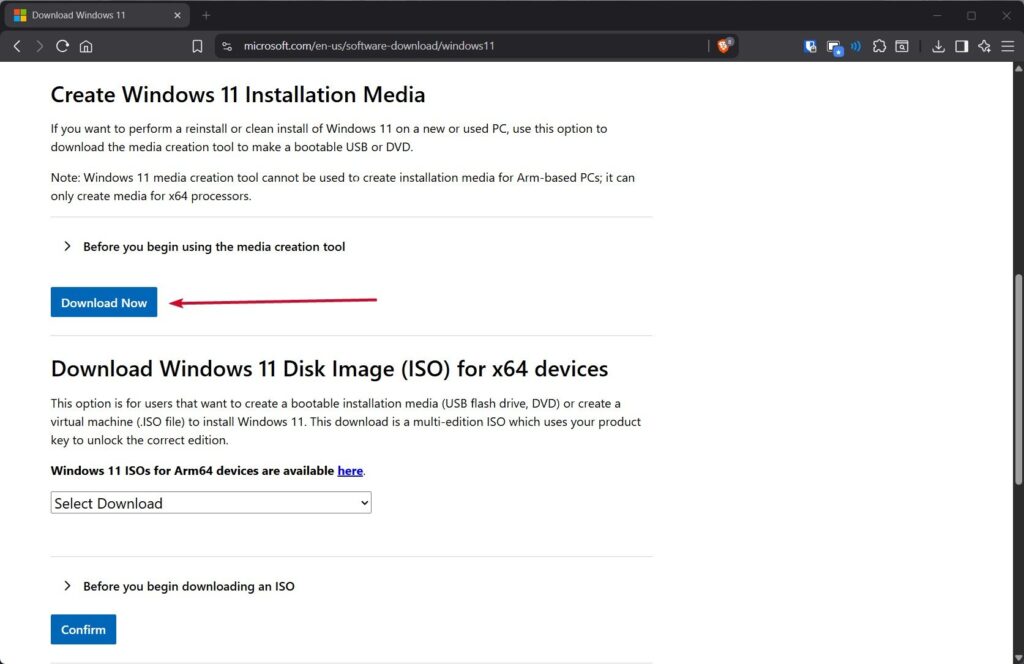
- Go back to the Microsoft download page .
- Thereafter, under Create Windows 11 Installation Media , click Download Now to get the tool.
- Once downloaded, open the file. Then, you might see a message asking for permission; click Yes .
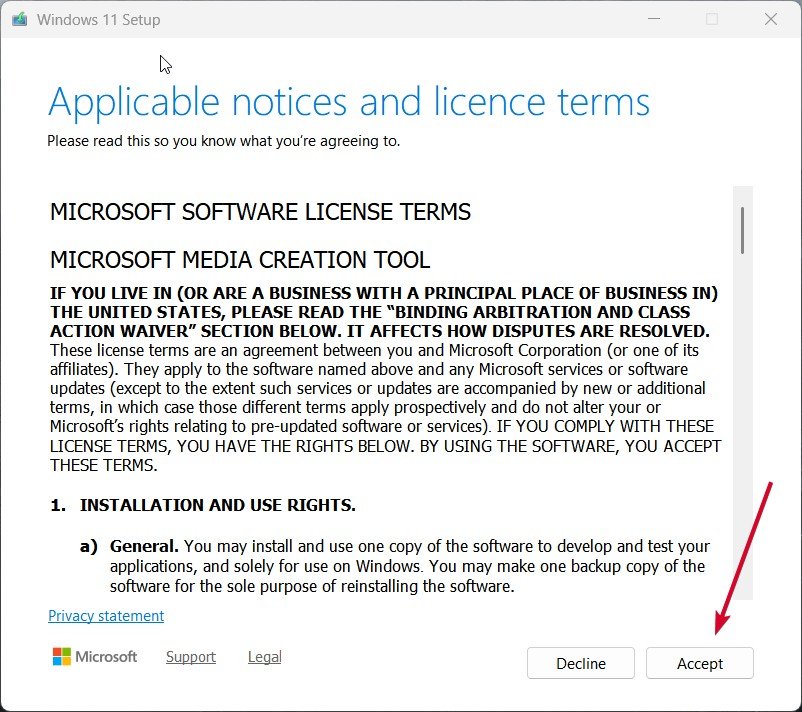
- Accept Microsoft’s license terms.
- Select your preferred language and edition. The tool usually detects these automatically, but you can change them if you want.

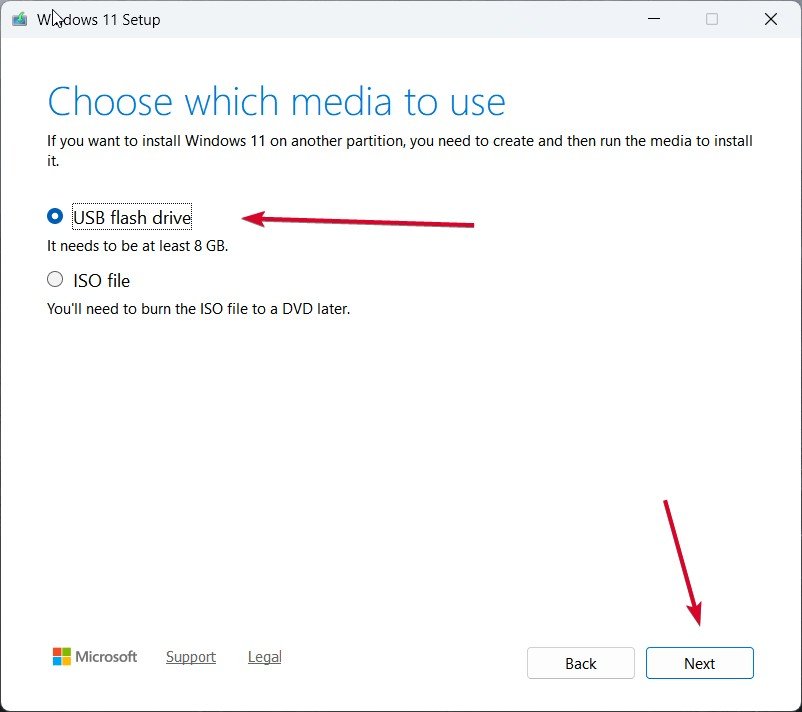
- Afterward, choose Create installation media (USB flash drive, DVD, or ISO file) and click Next .
- Now choose a USB flash drive and click Next .
- Select your USB from the list (make sure nothing important is stored on it).
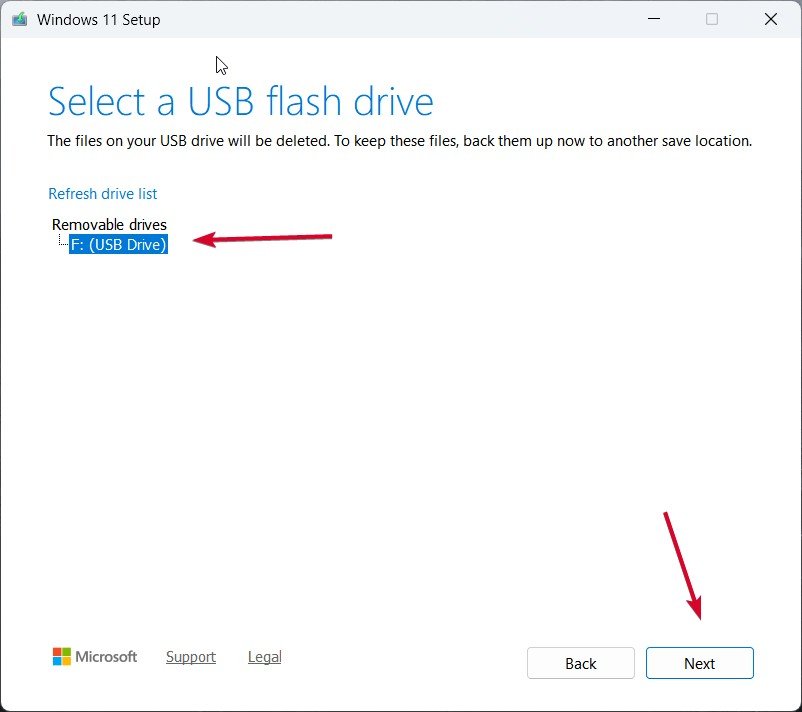
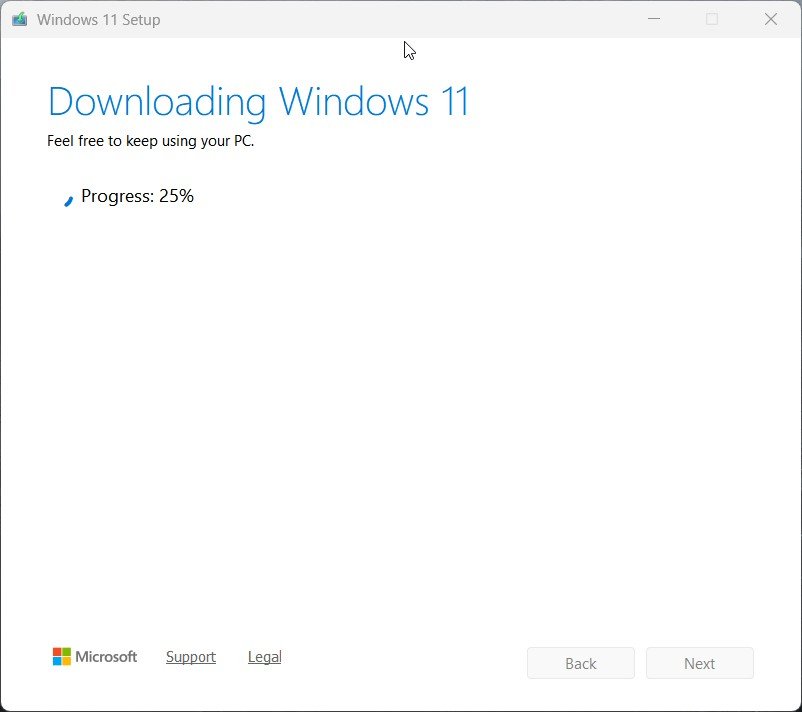
- Click Next again. The tool will start downloading Windows 11 25H2 and prepare your USB.
Method 2: Using Rufus with the ISO File
As previously discussed in this article, if you’ve downloaded the ISO file instead, you can use Rufus to make a bootable USB manually. This method gives you more control. Here’s how to use Rufus:
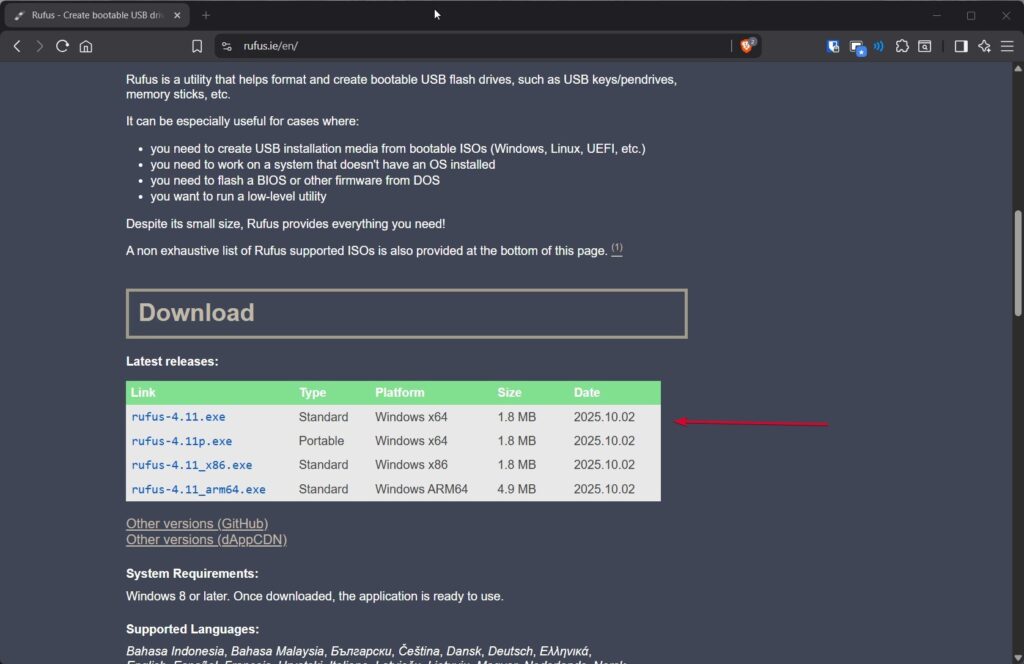
- Initially, go to the Rufus official website and download the latest version. It’s a small program that doesn’t require installation, just run it after downloading.
- Thereafter, insert your USB flash drive into your computer.
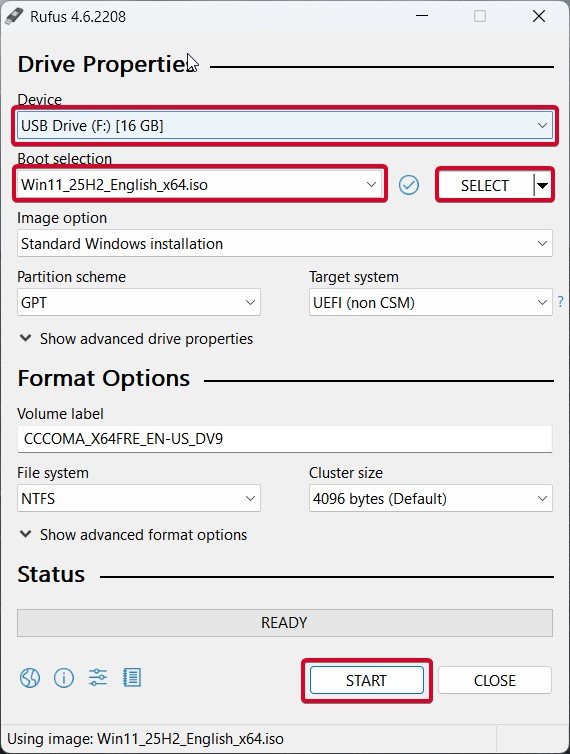
- Afterward, open Rufus. Then, it should automatically detect your USB drive under Device .
- In the Boot selection section, click Select and choose the Windows 11 25H2 ISO file you downloaded.
- Leave the Image option as Standard Windows installation .
- Under the Partition scheme , choose GPT (for modern UEFI-based systems). Only choose MBR if your computer is old and doesn’t support UEFI.
- Make sure the Target system says UEFI (non-CSM) .
- Give your USB a name under Volume label if you want (for example, Win11_25H2 ).
- Leave the rest of the settings as default and click Start .
- You’ll see a warning that all data on the USB will be deleted; confirm it.
Rufus will then format the USB and copy all necessary files from the ISO. The process usually takes 10–15 minutes. Once it’s done, your bootable USB is ready. You can close Rufus and safely eject the drive.
Step 3: Installing Windows 11 Using Your Bootable USB
Now that you have a working installation USB, it’s time to use it.
- Insert the bootable USB into the computer where you want to install Windows 11.
- Restart your computer.
- While it’s starting up, press the boot menu key, which varies by brand: Dell: F12 HP: Esc or F9 Lenovo: F12 Asus: F8 Acer: F12 MSI: F11
- After that, select your USB drive from the list and hit Enter .
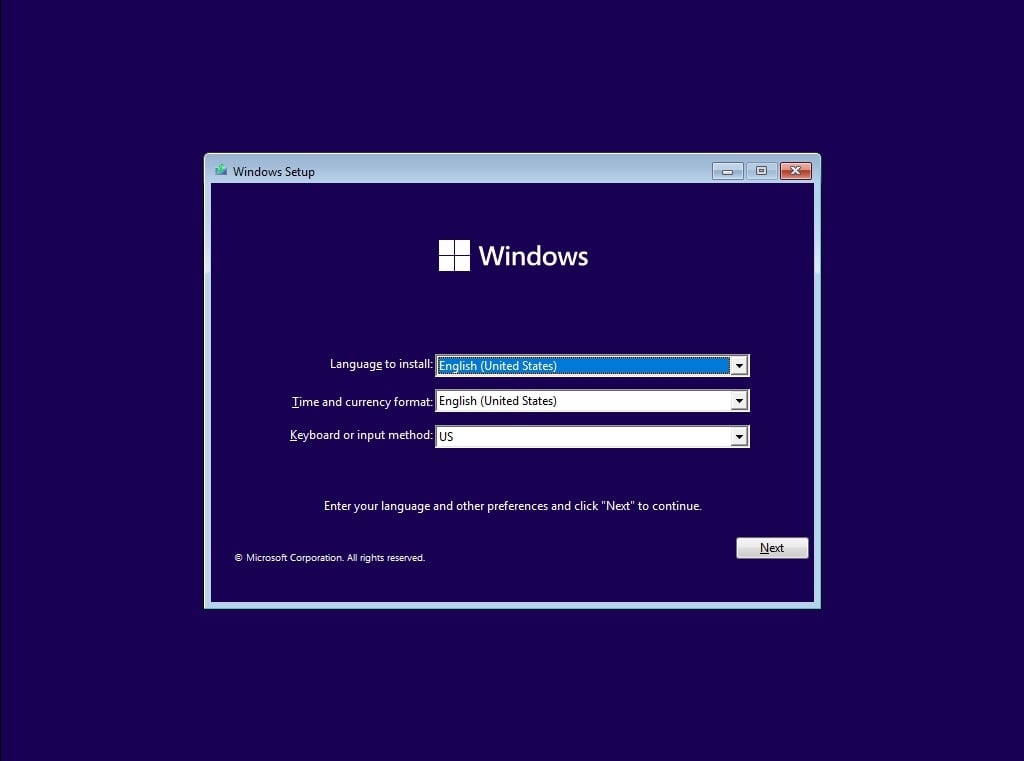
- The Windows setup will start automatically.

- Choose your language, time, and keyboard layout, then click Next .
- Click Install Now .

- If you have a product key, enter it here. You can also skip it and activate it later.

- Choose your Windows edition if prompted.

- Accept the license terms and click Next .
- Choose whether to upgrade your current installation or do a custom clean install. For a fresh start, choose Custom: Install Windows only .
- Finally, select the partition where you want Windows installed. Usually, it’s the main drive ( Drive 0 ). Delete old partitions if you want to wipe everything, then click Next .
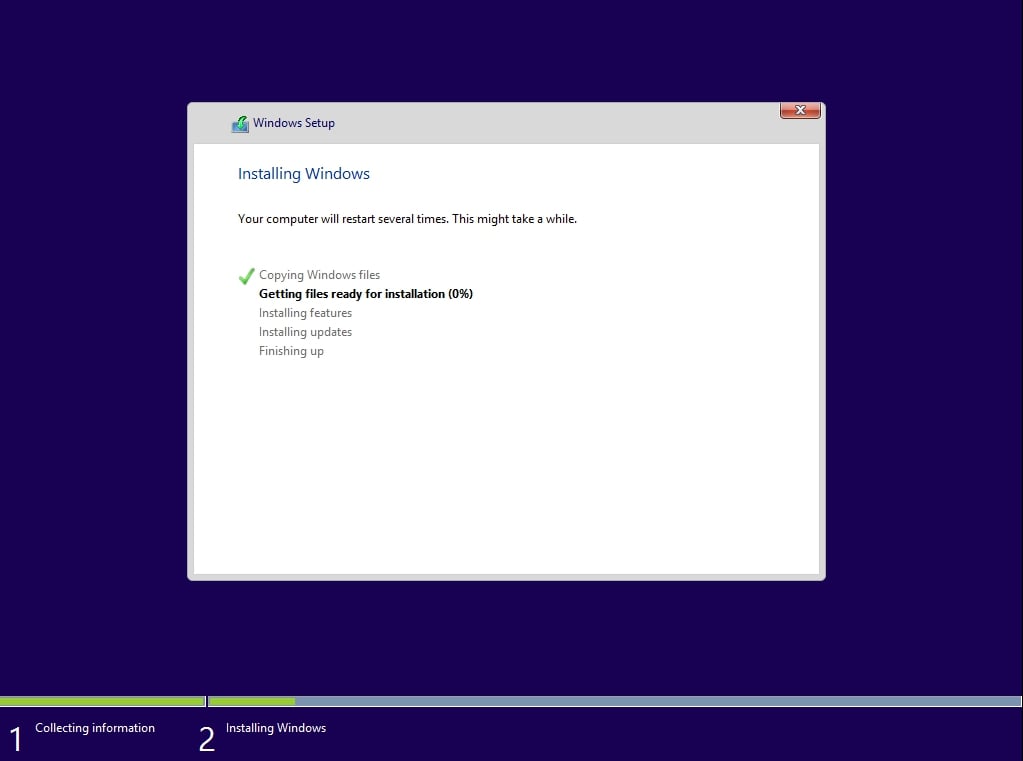
The setup will copy files, install features, and restart your system several times. Don’t remove the USB until Windows setup finishes and you reach the Hi, we’re getting things ready for you screen.
Why These Methods Work Best?
There are many ways to install Windows, but these two, Media Creation Tool and Rufus with an ISO — are the most reliable and simple.
- The Media Creation Tool is perfect for people who want Microsoft to handle everything automatically.
- Rufus , on the other hand, gives you flexibility, useful if you already have an ISO file or want to make a bootable USB that works on different types of PCs.
Both methods are completely free, and together they cover almost every situation, from first-time installs to advanced setups.
- Ghost Spectre Windows 11 Home (24H2/23H2)
- Ghost Spectre Windows 11 Pro (24H2 – 2024 Update)
- Download and Install Tiny11 on Low-End PCs (23H2 Update
Final Thoughts
Well, creating a bootable USB drive for Windows 11 25H2 may sound technical at first, but once you follow the steps I’ve mentioned in this article, it’s actually quite simple.
So, that’s all we have for you about how to create a Bootable Windows 11 25H2 USB. We hope that this guide has helped you. For more info, comment below and let us know.
Enjoyed this article?
If TechLatest has helped you, consider supporting us with a one-time tip on Ko-fi. Every contribution keeps our work free and independent.
